
Can a Non-Software Engineer Vibe Code a Real App with AI? I Tried It.
I got a short break before my next job begins. Already late to the party, but I decided to finally try something I’ve been curious about: vibe code an app with AI. As a non-software engineer, can I build a real full-stack app in a week using AI tools?
If you are still wondering what vibe coding even is, here is how Google puts it:
Vibe coding is a software development workflow that uses AI to generate and refine code from natural language prompts, with the developer acting as a guide rather than a traditional coder.
It is essentially coding by chatting—with AI as your copilot, and you as the idea person.
How Much Do I Know?
To set the stage, let me first talk about how much I know about software development and AI:
- I am a data scientist, so I know Python.
- I did quite a bit of data engineering tasks at my last job, so I am comfortable setting up a local development environment and using GitHub and the terminal.
- I have basic front-end knowledge — I learned HTML and CSS myself, and have a personal website that is deployed with GitHub Pages.
- I have worked with software engineers on data tracking requirements and product analytics, so I have a very high-level idea of how a backend system works (though I’ve never coded one myself).
- I have used AI to write code, but only for data science and analytics tasks. If you are like me — comfortable with some coding but not a full-stack software engineer — this article will probably resonate with you the most.
What I Built
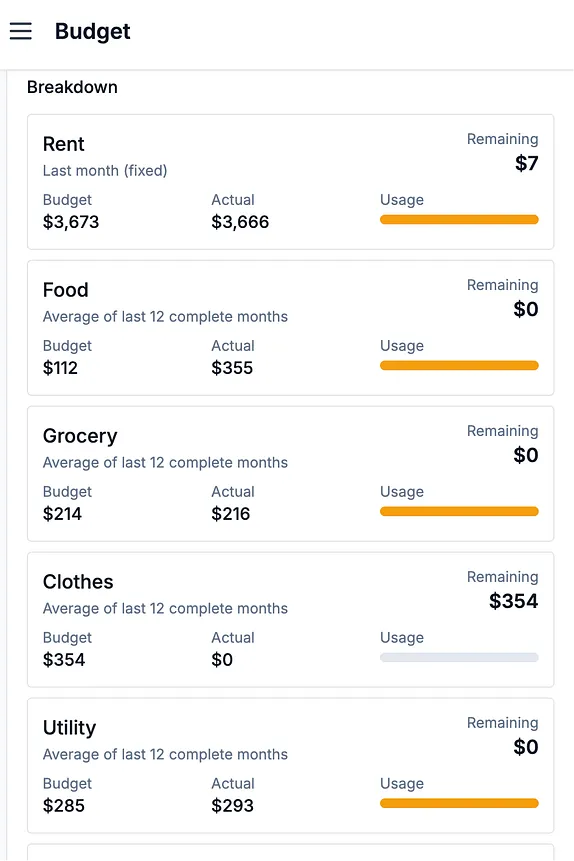
The app I tried to build is a spending tracker app.
The idea came from a real-life pain point. The app I used to log my spending started showing more and more ads and became really annoying. I tried other options like Credit Karma. Overall, it is a great app to have your credit score, cards, and cash flow in one place. However, it requires connecting to all my bank accounts and constantly fixing connection issues. It also has limited reporting capabilities with transaction categorization mistakes. I even tried Google AppSheet to build a no-code Google Sheet-based app, but there isn’t much customization I could do to the visualizations.
Therefore, I’d rather build an app myself that is tailored to my primary needs:
- I should be able to easily record my income and spending with a simple UI;
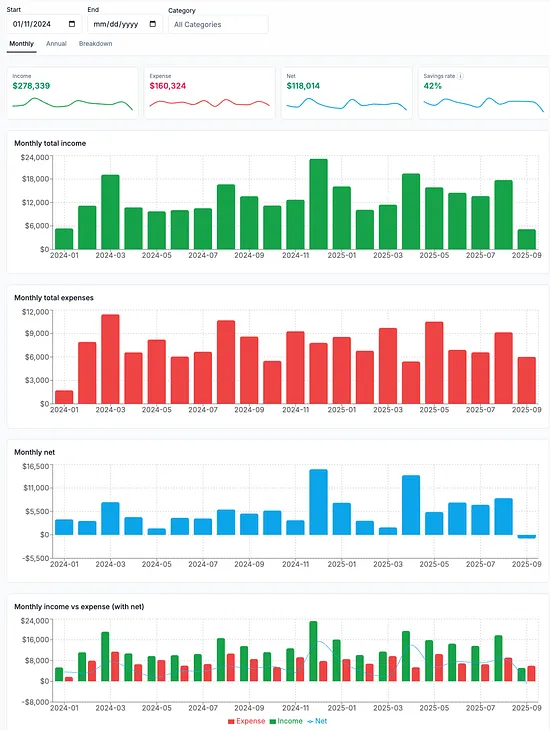
- It should help me understand my spending behavior and cash flow with analytics and visualization.
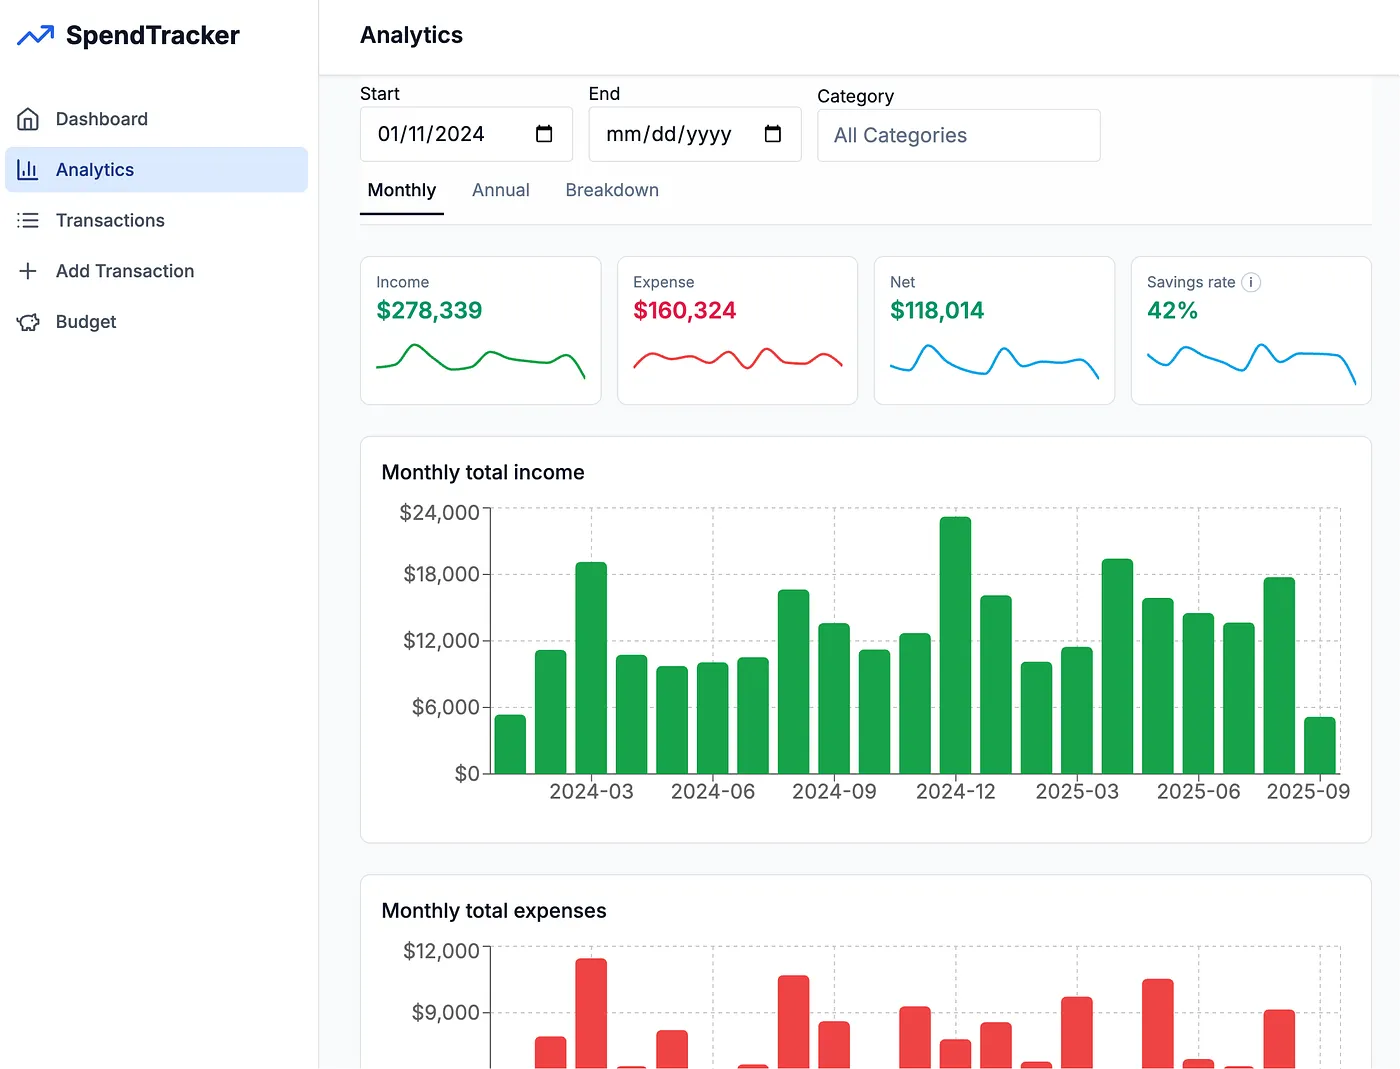
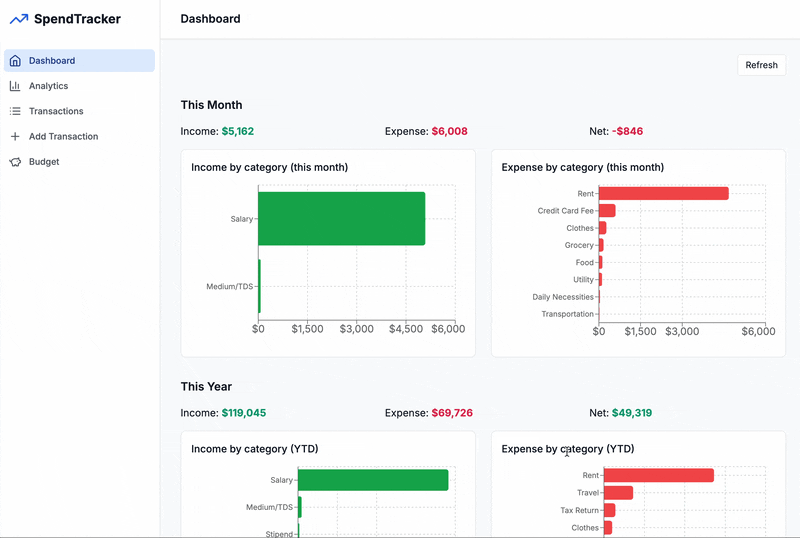
Below is a quick demo of the app I built in ~20 hours. You can find the code here.
My Vibe Coding Experience
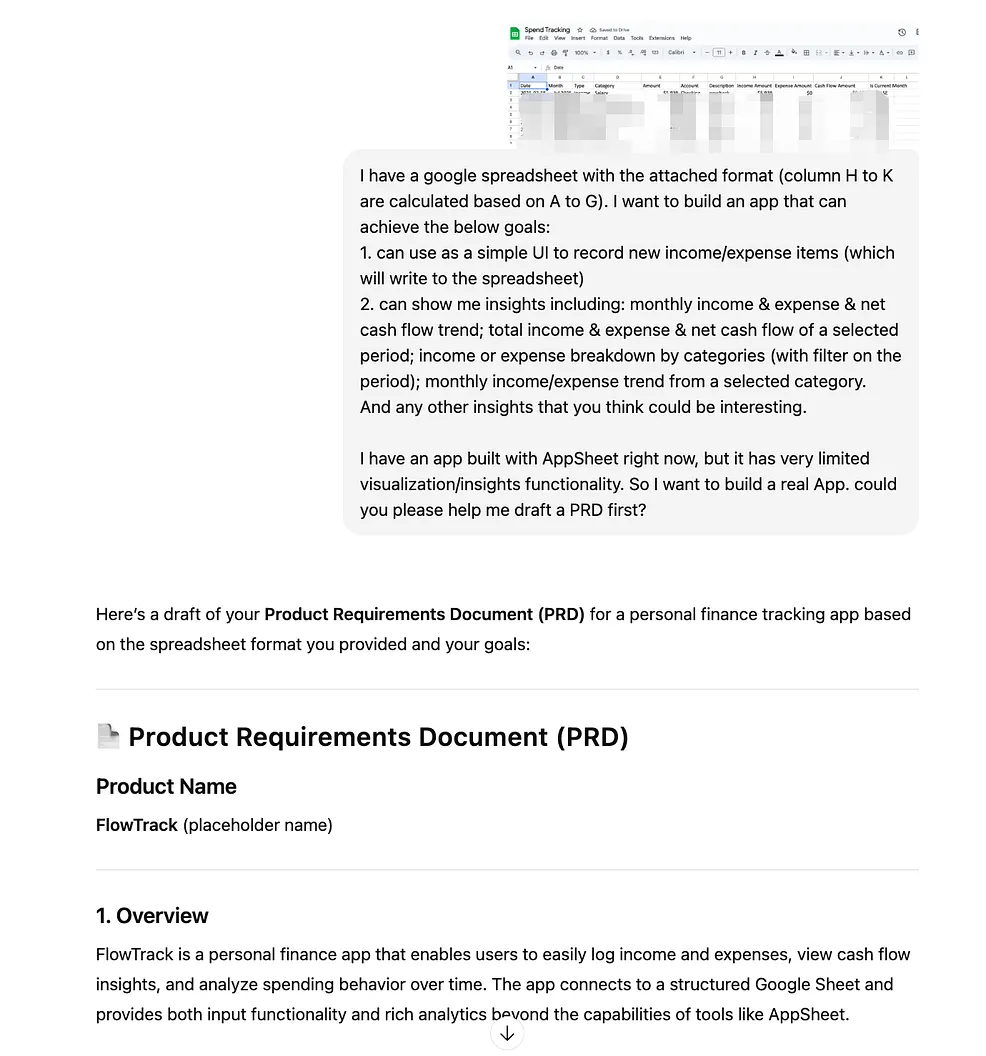
Step 1: Generate a PRD with ChatGPT
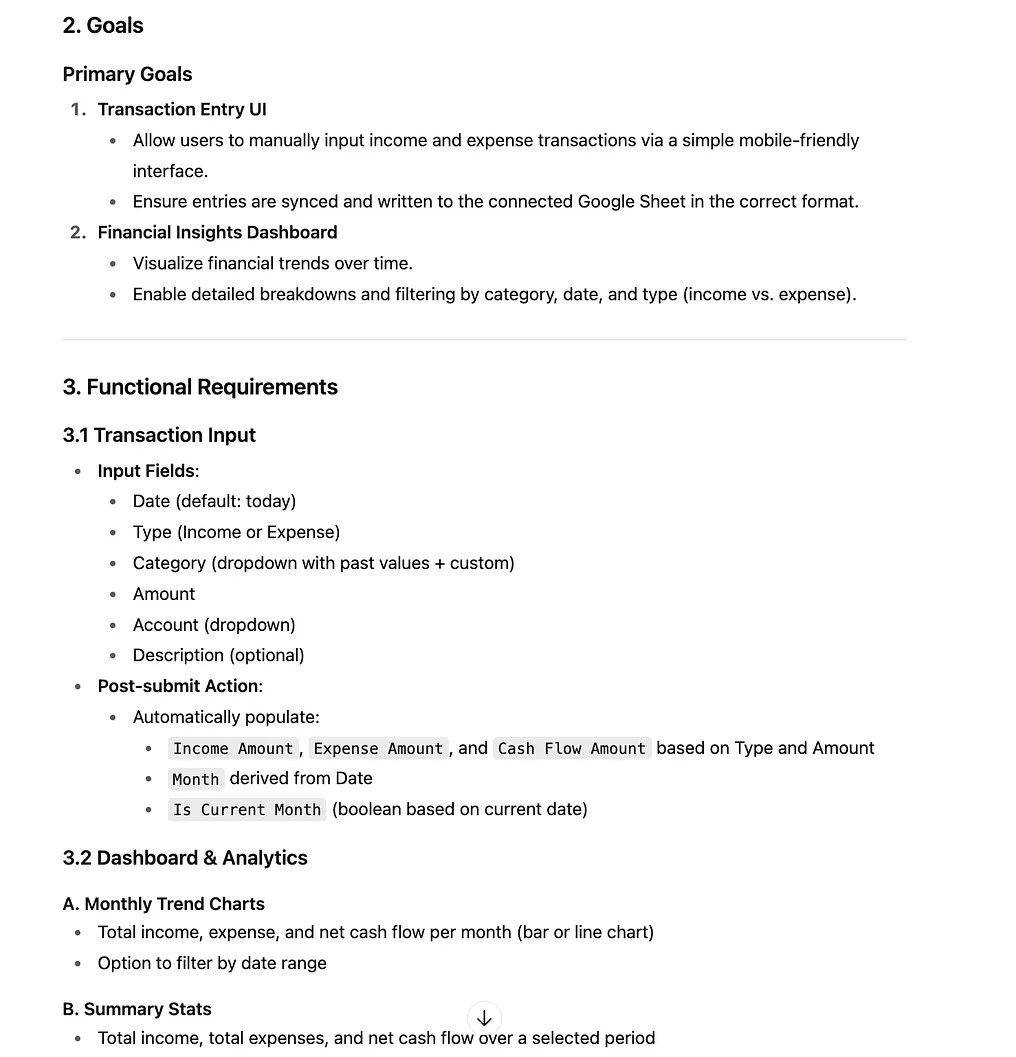
Before writing any code, the first thing I did was to describe my need and ask ChatGPT to generate a Product Requirements Document (PRD). This helps me to collect my thoughts, document the ideas, determine the key features, and decide on the technical setup.
ChatGPT also recommended different AI-assisted development tools, such as Glide and Replit. However, their free versions came with lots of limitations — or sometimes the AI feature just did not work well for me somehow. So I decided to vibe code everything from scratch.
Step 2: Use Cursor to build the MVP App
I used Cursor, a VS Code-based code editor that integrates with AI for easy code generation, editing, and auto-completion. Its free version comes with a Pro two-week trial — I used it to build my MVP(Minimum Viable Product) version of the App.
After I shared the PRD with Cursor, it just started “thinking” itself and built me an App skeleton with both backend and frontend code in minutes! Honestly, the efficiency and completeness blew my mind 🪄.
Here is the tech stack it chose — except for the GoogleSheets API, I have used none of them :)
- Frontend: React 18 + TypeScript + Vite
- Backend: Node.js + Express + TypeScript
- Charts: Chart.js with React wrappers
- Styling: Tailwind CSS
- Google Integration: Google Sheets API v4
It even generated a detailed Google Sheets API setup guide for me. I followed the guide and resolved some environment setup issues (with its help, of course). In less than two hours, I already had the app running locally with most of the core features I asked for!
Step 3: Migrate to Vercel for deployment
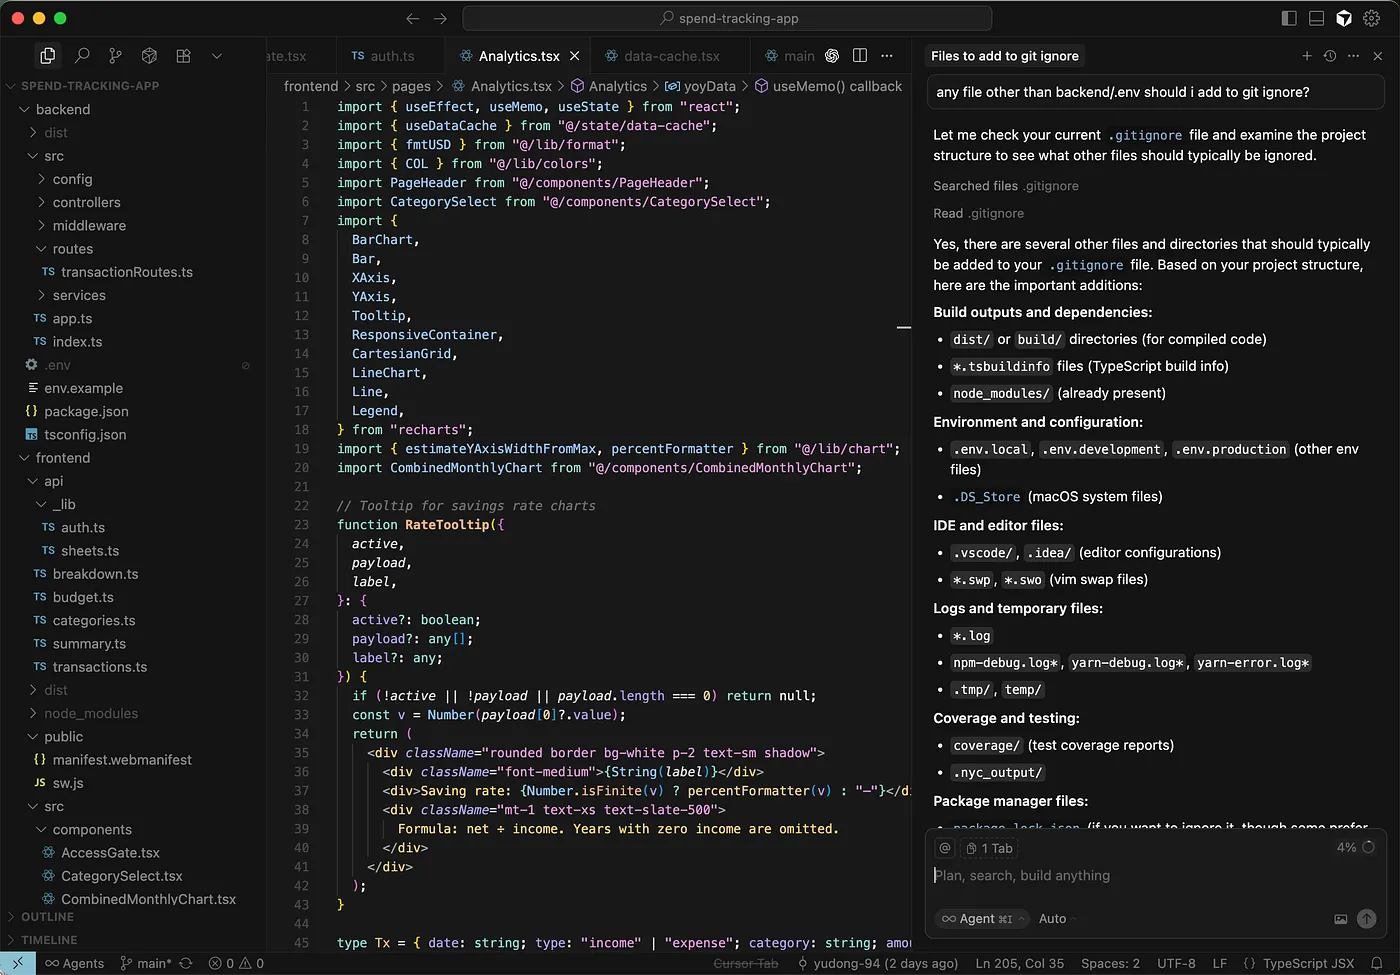
Ideally, I want to use the app to record and track my spending anytime and anywhere. Therefore, only having it running locally was not enough. I needed to deploy it.
So I asked both ChatGPT and Cursor for low-cost deployment options. After some discussion and tradeoffs, I decided to deploy it on Vercel. ChatGPT generated all the file diffs for me, so I could just copy and paste.
This migration process took me around three hours. The time was mostly spent on copying and pasting the files, making sure I updated the right piece of code, fixing minor TypeScript errors, and dealing with some AI hallucinations. Looking back, it should have been much faster if I had asked Cursor to make all the changes for me directly. But I was curious to test how much and how accurately ChatGPT could help by simply reading the GitHub repo.
Step 4: Iterative app development with Cursor and Codex
Once the app was live on Vercel, I started using it on my desktop and mobile devices. That sparked more product ideas — many of them are related to analytics and cashflow management, thanks to my background in finance and data science :).
For example:
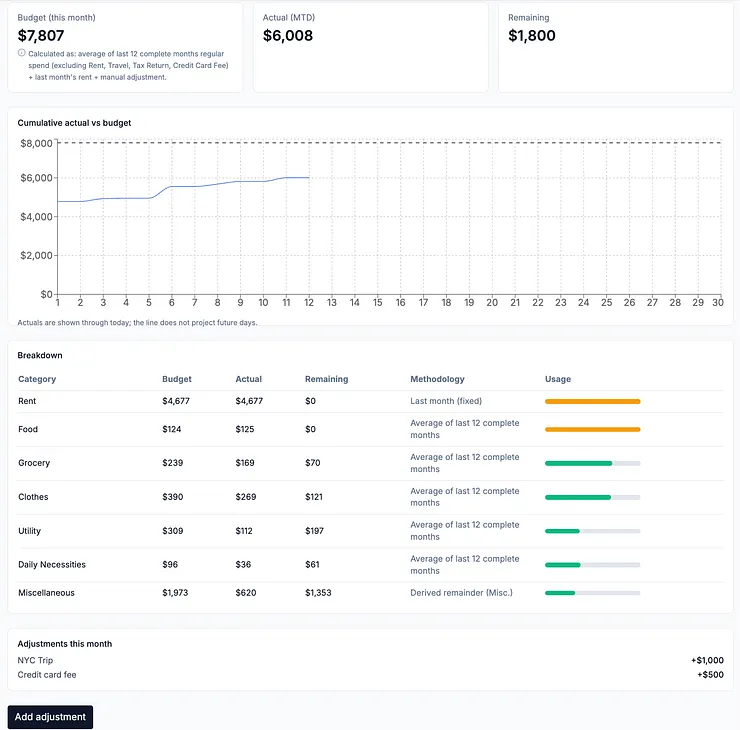
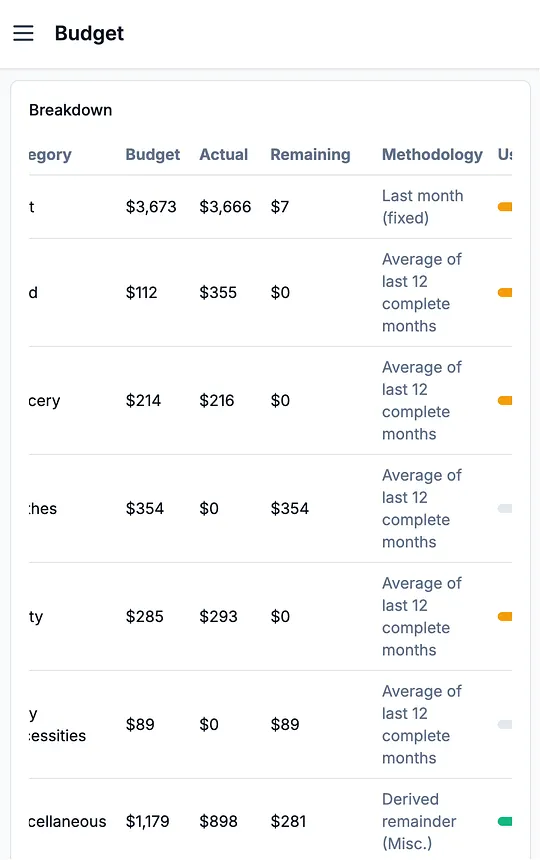
- Add automatic budget setting with manual override functionalities.
- Allow easy transaction exploration with time period and category filters.
- Enhance the analytics UI with new visualizations, such as a monthly and annual switcher, YoY saving pacing chart, and top category spend.
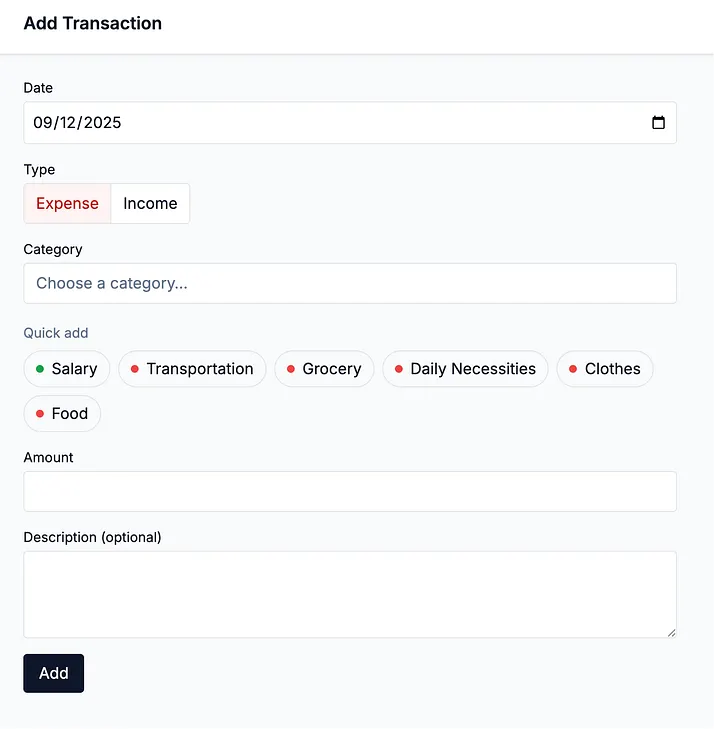
- Improve the “Add Transaction” UI with a quick add card of the last 6 used categories and automatic currency formatting, etc.
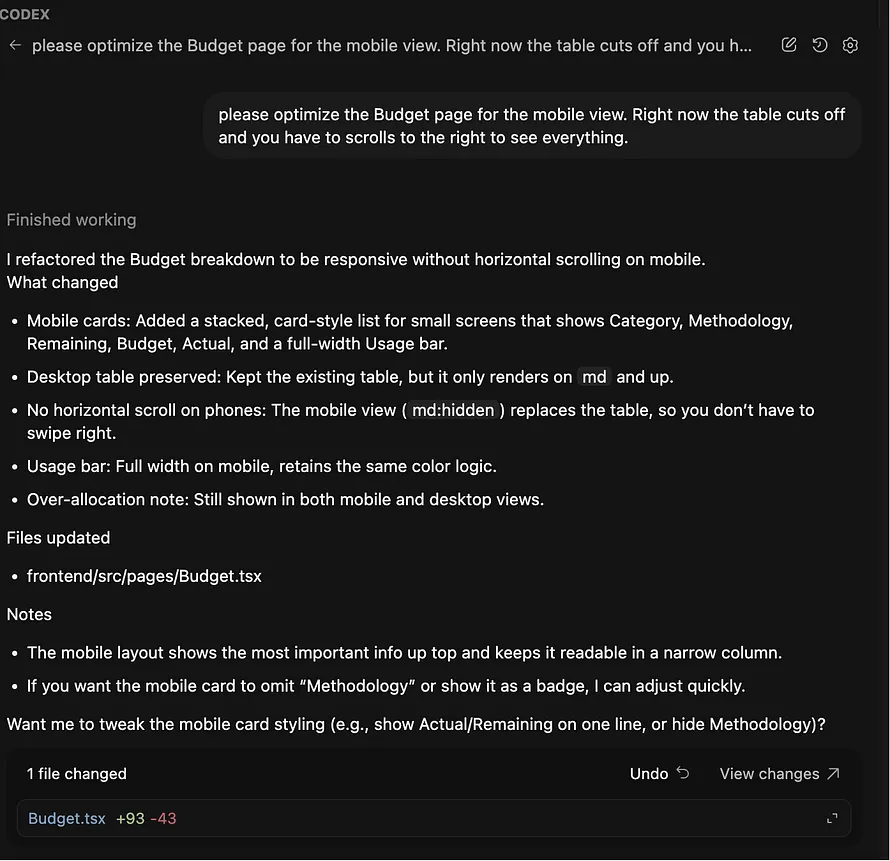
This is an iterative process — I submit requests as a Product Manager, ask Cursor to implement, preview the changes, tweak the feature, and repeat. I hit my Cursor free plan limit in the middle of the process, so I switched to Codex. It is the AI coding agent developed by OpenAI, in other words, ChatGPT’s own version of Cursor. It is included in the ChatGPT subscription. You can set it up on your GitHub or use the CLI. For simplicity, I installed the Codex extension on the Cursor IDE. It works very similarly to Cursor’s AI agent — you write your prompt in a side pane, and it “thinks” with GPT models, reads the files, tests, and applies code changes automatically.
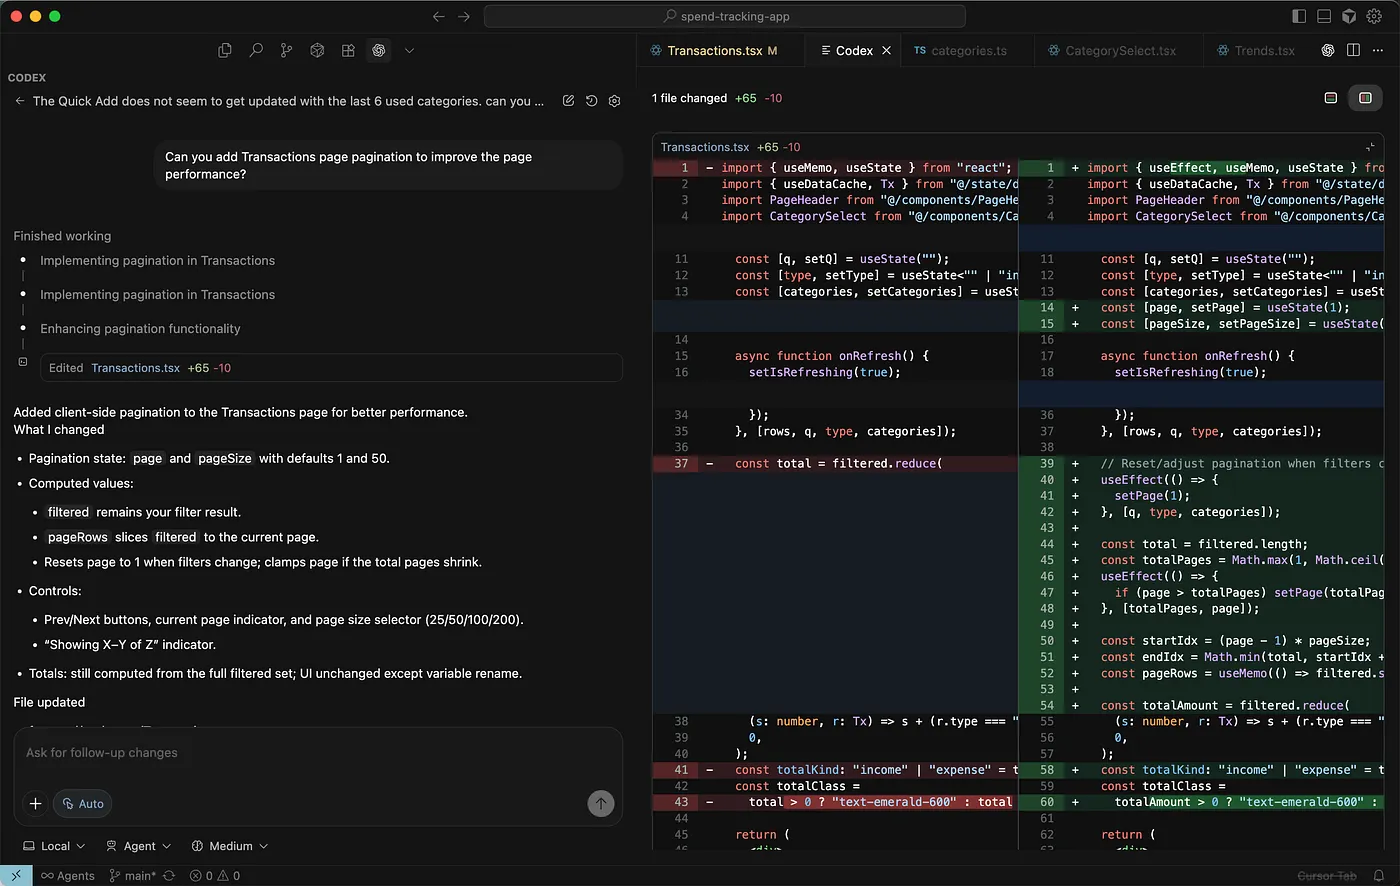
Sometimes the asks are concrete, as the ones I listed above, but sometimes it’s more vague, like “the Budget table cuts off and does not show the full row on the mobile view, help me optimize it”. Surprisingly, AI is able to generate decent solutions every time, or at least a version that helps me to think through what exactly I want.
I also asked AI to suggest technical improvements. It had many great ideas on app performance enhancements, API behaviors, and security. I am not an expert there, so I just followed its suggestions and asked it to make the magic happen.
Throughout this iterative process, I wrote zero code — everything was done by chatting.
Step 5: Clean up the codebase and add documentation
After one week’s iterative improvement, I reached a point where I was pretty happy with the app and ready to use it daily. Before wrapping it up (and writing this article), I took the last steps for my sanity:
- Remember all the mess I caused with copying and pasting code from ChatGPT? There were bad indentations everywhere — as a Python user, this hurts my eyes. Legacy files also sit there silently. Therefore, I asked Codex to clean up the repo and add linting.
- I also asked it to update the README file so that I and anyone who reads the repo actually know what is going on.
My Key Learnings
Of course, this is a toy project and is much more straightforward than real-world software development. However, it still has been a very eye-opening experience, and now I am officially a fan of vibe coding. It is a powerful way to turn product ideas into MVPs quickly, even if you are not a full-stack engineer. I am super excited to vibe code more to improve my productivity.
What are my tips for vibe coding?
1. Start with a real problem.
Vibe coding lowers the barriers to coding. As a result, product ideas are increasingly important. In my example above, I started from a real frustration and built around my own needs. I combined my finance and data science knowledge and brainstormed with AI to generate concrete product ideas. A spend tracking app is definitely not a billion-dollar startup idea, but it solved my problem and gave a great starting point for my vibe coding journey.
2. Ask AI to explain.
I don’t have much context on app development. This time, AI is in the driving seat, writing the code. Sometimes I feel like AI “thinks” while I am the robot that follows its instructions — “accept this change”, “paste your Google Sheets API key here”, “click this button to deploy on Vercel”, etc.
However, remember that AI is great at explaining things, and they don’t judge you (hopefully). Therefore, I constantly asked it to explain to me “how all these files are connected”, “where is calculation defined”, “why we need to change this file”, etc. This ensures I also learn and grow my technical judgment throughout the vibe coding process.
3. Be iterative and patient.
In vibe coding, you are the PM, and AI is your engineering team. It’s just like the real-world product development process — AI does what you request, and they still make mistakes (or hallucinate). Then you try the product with customers (likely also yourself) and provide feedback or new requests to the AI. Therefore, it is never one-and-done. Be patient with AI and with yourself :)
If you haven’t tried vibe coding before and now want to give it a shot, I highly recommend you start with a small real-life problem, chat with AI, brainstorm some ideas, and see where it takes you. You might be surprised at what you can build. I hope you enjoy the journey as much as I did!